

An irrefutable fact in education is that we cannot look inside a student’s mind to determine whether learning has taken place. We cannot directly measure if a student knows or understands a concept because those ideas are internal. Good teaching requires us to find ways for students to demonstrate what they know because learning is invisible until it is expressed. Scripture teaches a similar principle. Genuine faith becomes visible through obedient actions (James 2:17-18). While learning and saving faith are very different, both remind us that internal realities are demonstrated through outward responses.
This is why we teach education majors to write measurable objectives. Rather than saying students will “learn,” we use action verbs such as identify, analyze, apply, design, implement, evaluate, select, create, justify or integrate. With clear instructions and appropriate assessment tools, students demonstrate their thinking through what they do. Their performance provides evidence of learning.
In the music classroom, assessing listening, for example, presents a challenge because music is abstract. We cannot see sound or hold it in our hands. We must provide ways for students to show us if they understand and comprehend what they hear. Movement provides one of the most effective solutions. Students can respond physically to changes in the music or communicate what they hear by manipulating an object. Their actions reveal their understanding. We can observe whether they recognize the transition from the A section to the B section, respond to a change from legato to staccato or indicate a crescendo. Movement makes their thinking visible.
Elementary music teachers have embraced this idea with incredible creativity. Scarves, stretchy bands, ribbons, streamers, pool noodles, parachutes and many other hands-on teaching tools have become classroom favorites. See an example here. These materials bring energy and excitement to music lessons while giving teachers an objective way to assess listening skills. Students enjoy moving with the music, and teachers gain valuable evidence of musical understanding.
Several years ago, I was invited to present a workshop on interactive resources for music education. I wanted every participant to experience the activities firsthand, which meant providing a streamer for each person. With nearly 80 participants, purchasing commercial streamers at about $6 each was not practical. With my husband’s help, I decided to make my own. Using inexpensive fishing tackle from the hardware store and a few simple materials, we created durable streamers for less than a dollar each. If you would like to make streamers for your own classroom, Sunday school, children’s choir, or camp, I’ve included the step-by-step instructions below.
As Christian educators, we recognize that only God sees the heart and mind completely (Psalm 139:23-24). Our responsibility is to faithfully teach, wisely assess and create opportunities for students to demonstrate what they are learning. Whether through movement, singing, or creative expression, visible responses help us nurture both musical understanding and joyful participation. In doing so, we seek excellence in teaching as an act of faithful stewardship, knowing that “whatever you do, work heartily, as to the Lord” (Colossians 3:23).
DIY Movement Streamers
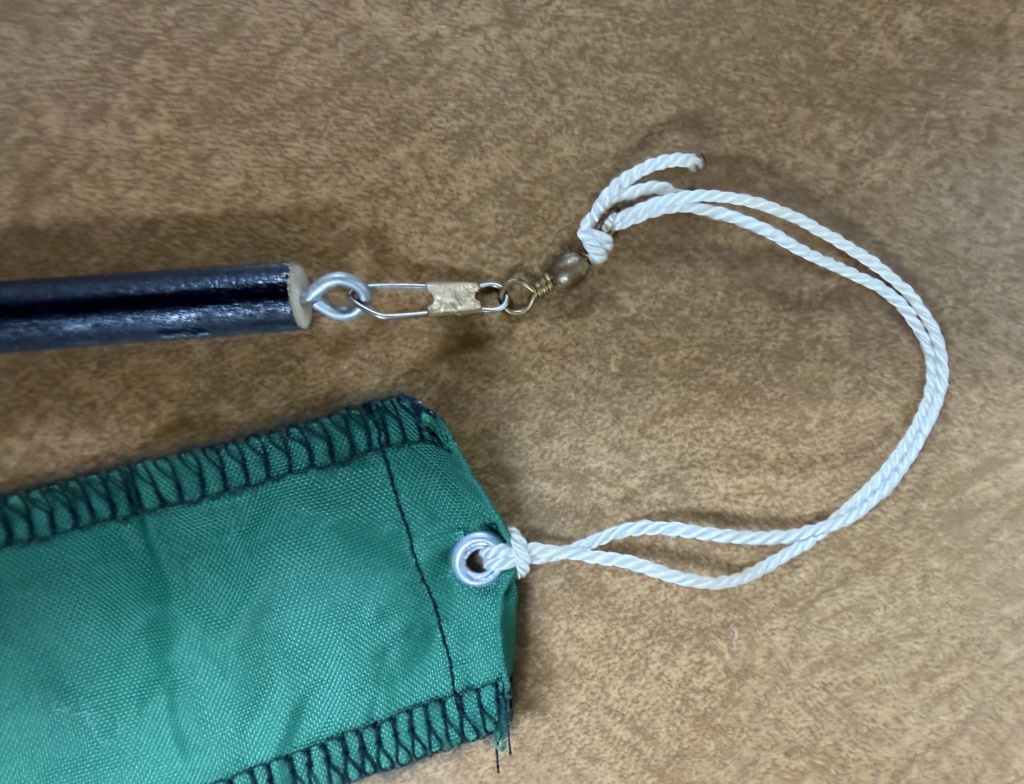
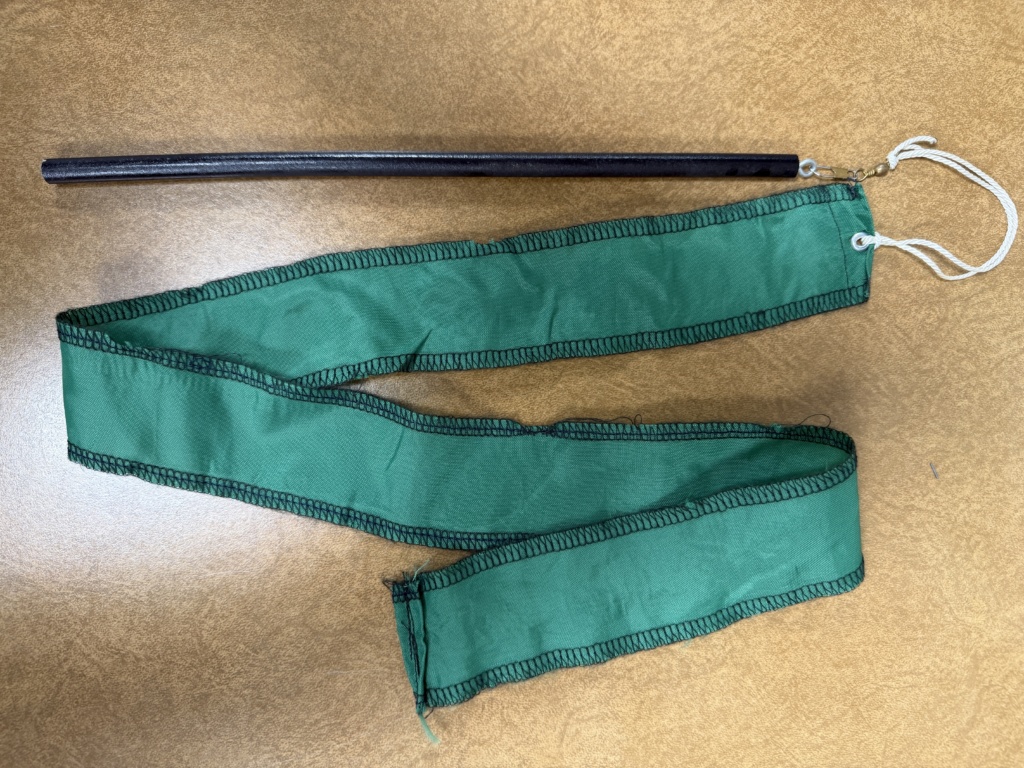
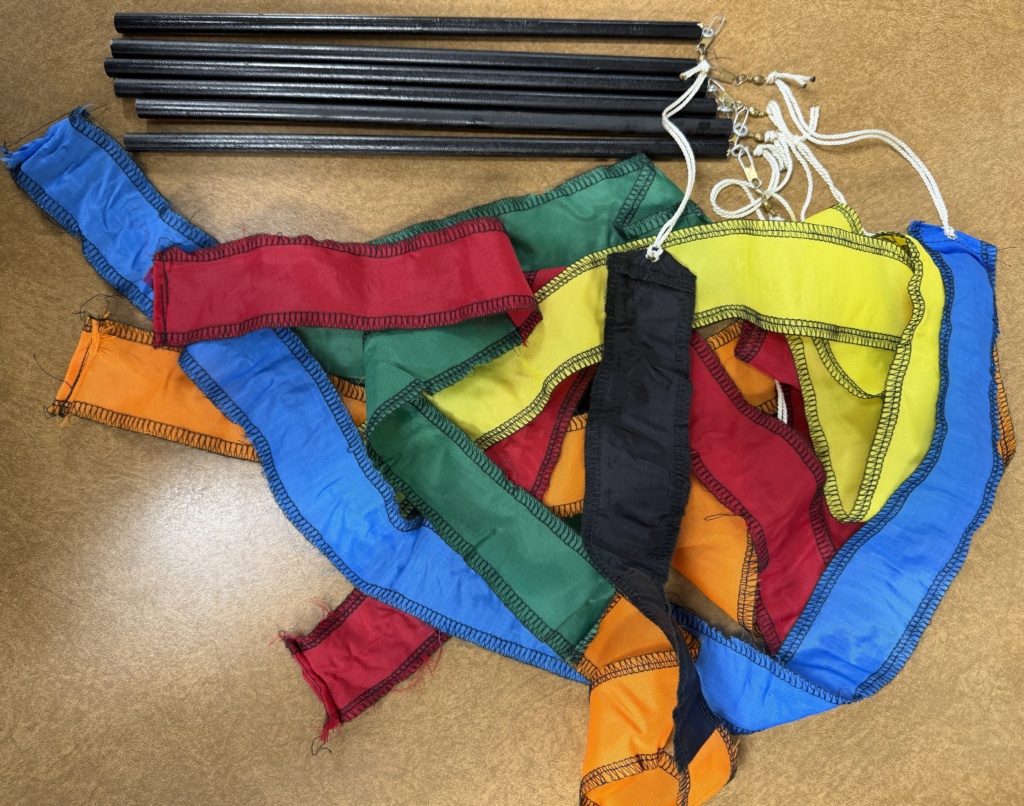
For each streamer, you will need:
• 12-inch × 3/8-inch wooden dowel (You can find 4-foot dowels at Home Depot or L
owes. Cut into 12-inch pieces.)
• Black spray paint
• One 2-inch × 40-inch strip of lightweight nylon fabric
• 19 inches of nylon twine
• One size 5 brass snap swivel (available in the fishing department)
• One #216 × 11/16-inch screw eye
• One small grommet and eyelet setting tool
Preparing the Dowel
1. Spray-paint the dowels and allow them to dry completely.
2. Cut the painted dowels into 12-inch lengths.
3. Using a 1/16-inch drill bit, drill a pilot hole approximately 1/8 inch deep at the top of one end of the dowel.
4. Twist a screw eye securely into the pilot hole.
Preparing the Streamer
1. Cut the nylon fabric to 40 inches long.
2. Finish the top edge by folding the cut edge 1 inch toward the wrong side, then folding it over another 1 inch to create a sturdy triple-layer hem. Stitch the hem.
3. Fold the selvage edge over 1 inch toward the wrong side and stitch.
4. Cut the fabric into 2-inch-wide strips.
5. Finish the long edges of each strip with a rolled hem or serger.
6. Cut a small slit in the center of the triple-layer top hem and install a grommet using the eyelet tool.
7. Cut a 19-inch length of nylon twine and fold it in half.
8. Insert the folded loop through the grommet. Pull the loose ends through the loop and tighten with a knot.
9. Thread both loose ends through the eye of the size 5 brass snap swivel.
10. Tie a secure knot approximately 4 inches from the top of the streamer, leaving enough loop to allow the swivel to move freely.
Assembly
1. Clip the brass snap swivel onto the screw eye in the dowel.
2. Give the streamer a gentle tug to make sure all knots and hardware are secure.